HOW TO USE CAPTAINCALC

How to Use CaptainCalc

Start with setup, follow the screens for your task and finish with a result you can review, save or export. Available tools depend on your access level, vessel setup and installed data.

01

Install and complete first launch

Open the profile from Home and enter approved vessel, hydrostatic, stability, tank and capacity data. You can explore the app with the built-in example vessel, then replace every example value before real work.

  1. Open Settings and select the working language and units shown by the app; confirm the interface changed before entering vessel data.
  2. Review Privacy, advertising, offline and backup controls for your region and access level; read the decision-support and data-boundary notices before continuing.
  3. Open Vessel Profile and load the clearly identified built-in example vessel to explore the app; never carry example values into an operational decision.
  4. Return to Home and confirm the selected vessel, available workspaces and access/data requirements; resolve any missing requirement before starting a task.
Follow the steps in the app

Read the detailed guide

Install and complete first launch
02

Understand the control center

Not a loose collection of calculators. CaptainCalc keeps vessel, voyage, source and record context visible from input to export.

  1. After selecting a vessel, open Home and review the operational overview; a Home card is navigation and context, not a newly calculated result.
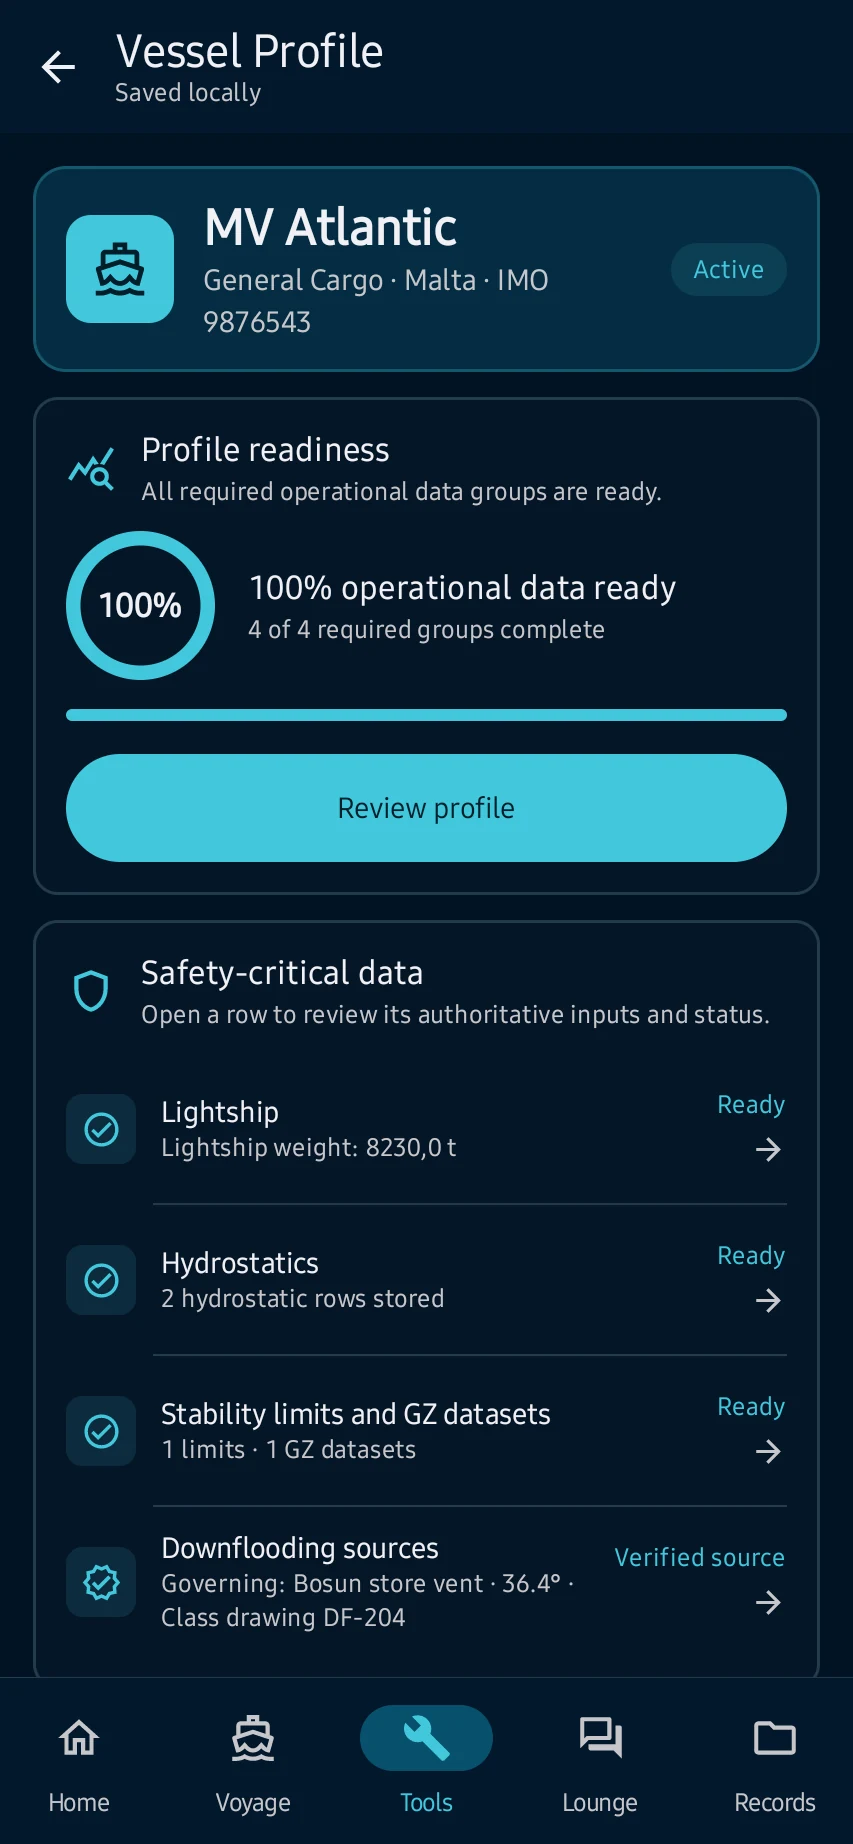
  2. Open Vessel Profile from its card and confirm identity, readiness and source-backed setup before using vessel-dependent workspaces.
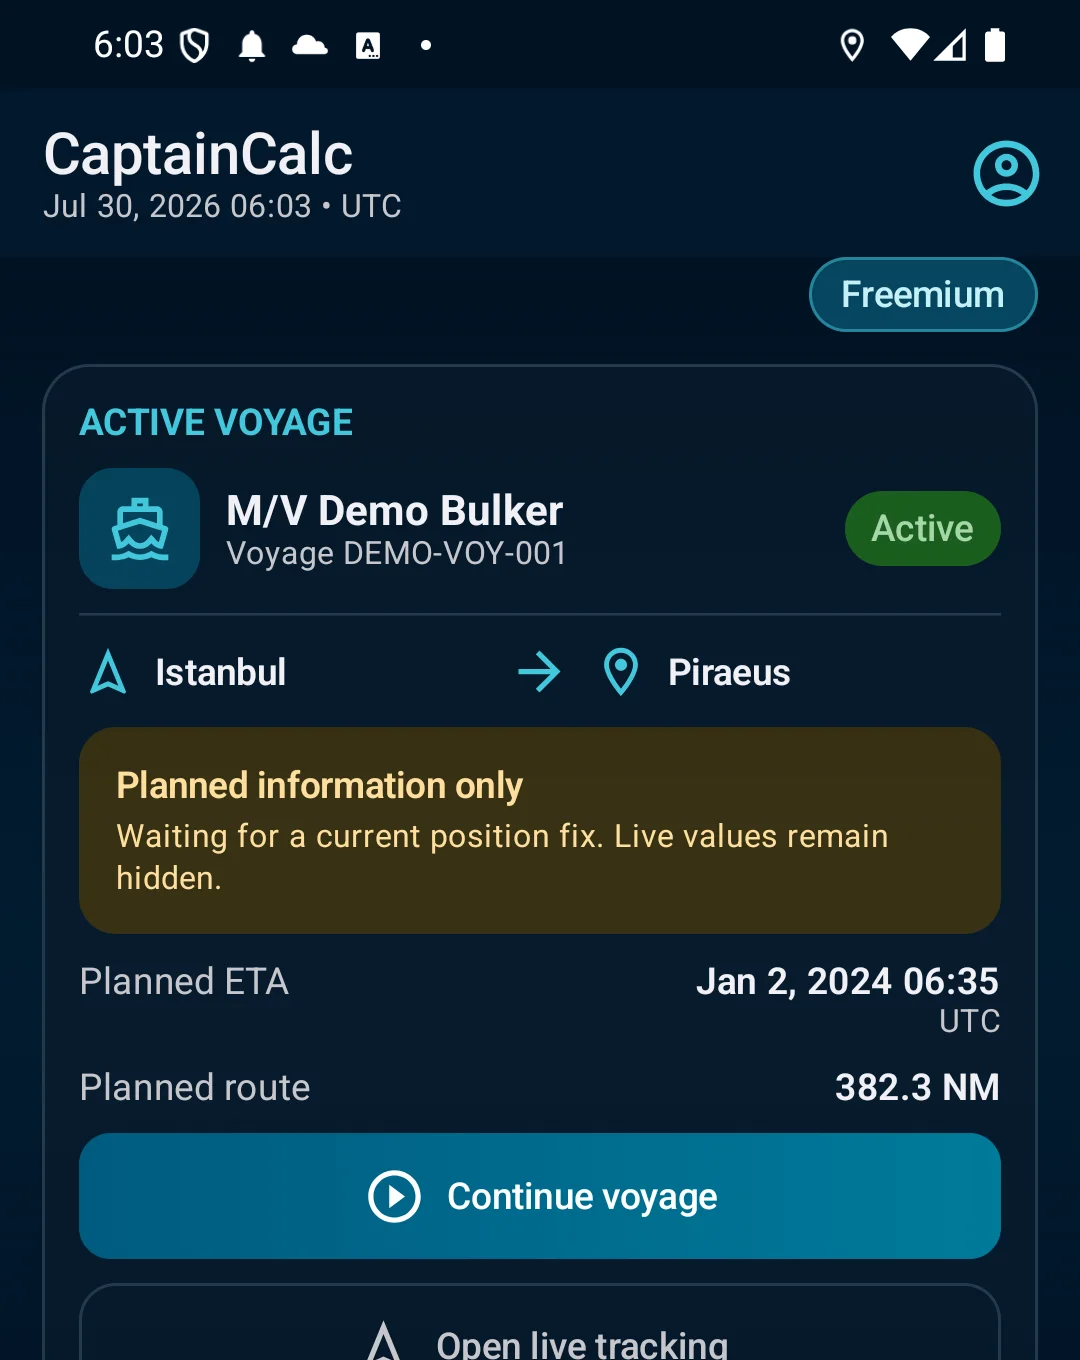
  3. Open the active voyage card and verify route, ETA and progress belong to the intended vessel and voyage before continuing.
  4. Open Records from the recent-work area and confirm saved timestamps and source details; resolve missing setup instead of inferring a result from a summary.

Follow the steps in the app

Read the detailed guide

Understand the control center
03

Create the vessel profile

Open the profile from Home and enter approved vessel, hydrostatic, stability, tank and capacity data. You can explore the app with the built-in example vessel, then replace every example value before real work.

  1. Home → Vessel Profile → create a profile or load the built-in example vessel to explore the app.
  2. Enter identity and principal dimensions, then add only approved hydrostatic, stability, tank, hold-capacity and deviation data needed by your workflows.
  3. the profile shows its completeness and source details, and supported calculators can select it as the active vessel.
  4. Resolve missing-unit, duplicate-draft and range warnings before saving. Demo and unverified values are not operational vessel data.

Follow the steps in the app

Read the detailed guide

Create the vessel profile
04

Plan and monitor a voyage

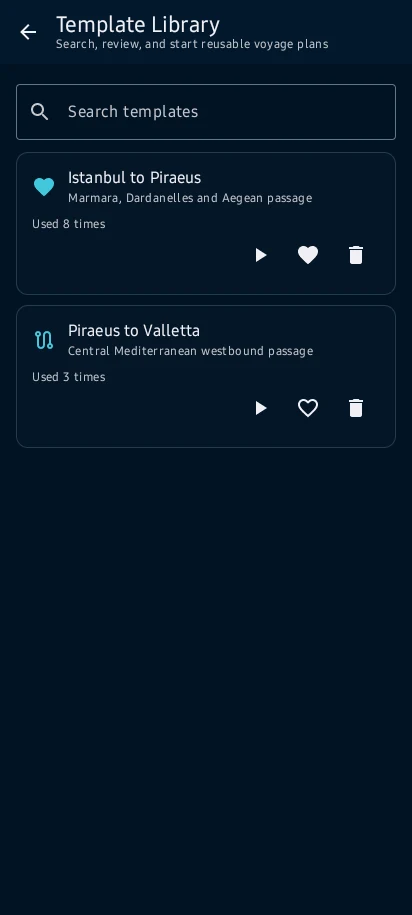
Create a voyage or template, add departure, destination and waypoints, review route distance and ETA, then prepare a compatible offline map pack before leaving reliable coverage.

  1. Voyage → New Voyage; select the active vessel and use UTC consistently for the plan.
  2. For a example, enter Istanbul as departure, Piraeus as destination, a planned departure time, speed and reviewed waypoints.
  3. the route, distance, planned ETA and progress context appear together; review every leg and map-source limitation.
  4. Save the voyage only after resolving route warnings. Export GPX, KML, CSV or PDF only when that format is offered, then inspect the file.

Follow the steps in the app

Read the detailed guide

Plan and monitor a voyage
05

Run a quick bridge calculation

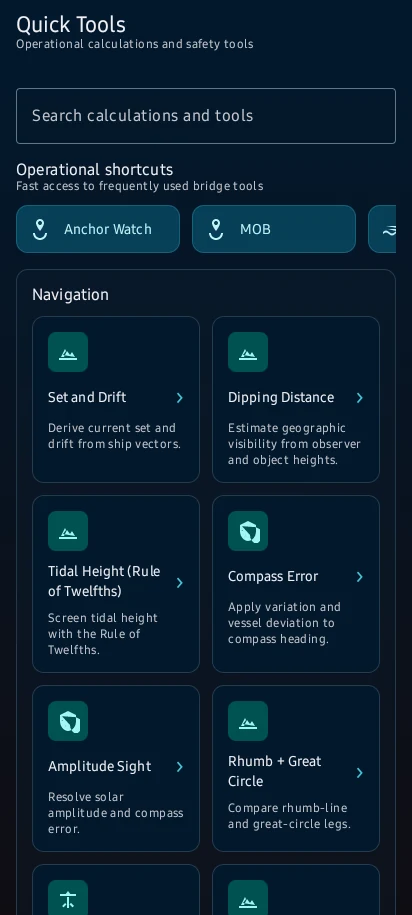
Create observations with UTC time, DR position, body and sextant inputs; apply corrections, reduce sights and combine LOPs into a fix. Use quick calculators for repeatable bridge checks and save key results.

  1. Tools → Quick Calculations → choose the calculator that matches the bridge task.
  2. For an ETA example, enter 120 NM and 12 kn in the displayed units; the time-to-go should be 10 hours before adding a departure time.
  3. the calculator shows the result, method context and on-screen messages without changing vessel records unless you save it.
  4. Correct incomplete or inconsistent units before using the value. Save or copy the result only when the screen offers that action.

Follow the steps in the app

Read the detailed guide

Run a quick bridge calculation
06

Use tides, currents and UKC

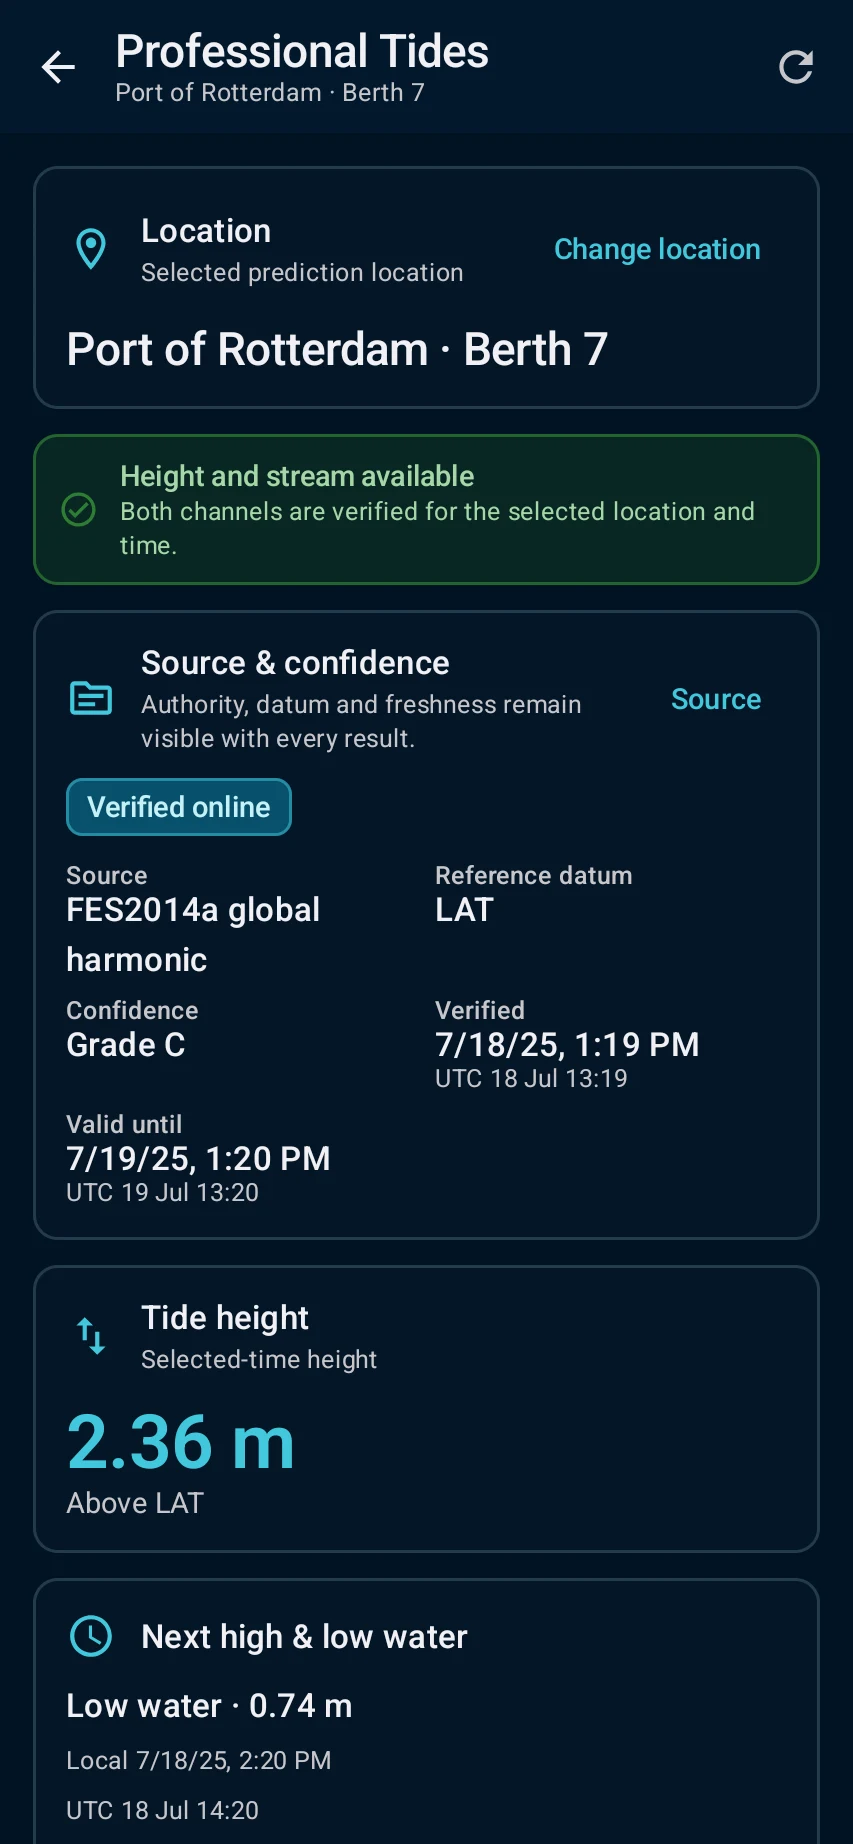
Select a station or coordinates, check the source, datum, confidence and validity, then review height or current. For UKC, enter draft, squat and safety margins and save the result with its source details.

  1. Tides & UKC → select a station or coordinates and confirm that the required source or offline pack is available.
  2. Check provider, datum, time basis, validity and confidence; for a training UKC check enter clearly labelled example draft, STW-based squat and safety margins.
  3. tide/current and net UKC remain linked to their source details, assumptions and selected time.
  4. Resolve expired, unverified or missing-source states before saving. Compare operational limits with approved vessel, port and company information.

Follow the steps in the app

Read the detailed guide

Use tides, currents and UKC
07

Review a stability case from load plan to result

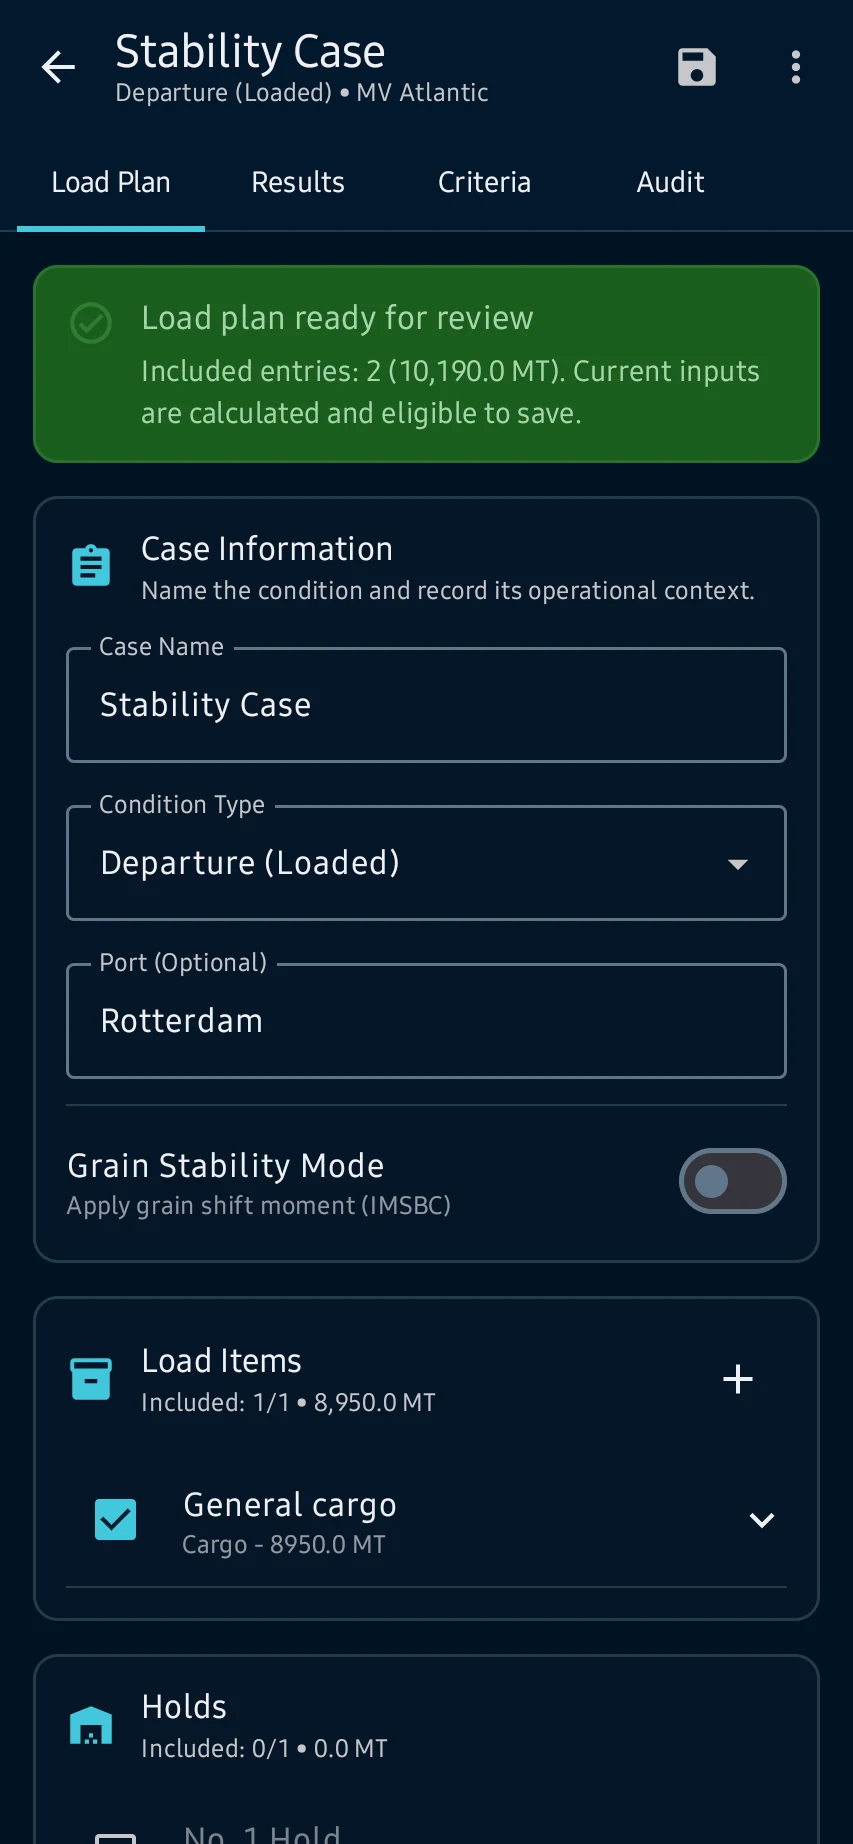
Choose the active vessel and condition, enter measured values carefully, correct highlighted issues, calculate, compare with approved criteria and save the record. Replace all example values before real work.

  1. Load Plan: open Stability, select the active vessel and case, then review entered weights, centers, tanks, hydrostatic source and readiness messages.
  2. Results: calculate the condition and review displacement, KG, corrected GM, GZ curve, assumptions, contributors and any operational warning.
  3. Criteria: compare corrected GM, GZ areas, range and downflooding evidence with the applicable approved criterion set and its source.
  4. Final review: confirm the entered values and their sources, timestamps and calculation details; resolve incomplete or failed states before saving or exporting the report.

Follow the steps in the app

Read the detailed guide

Review a stability case from load plan to result
08

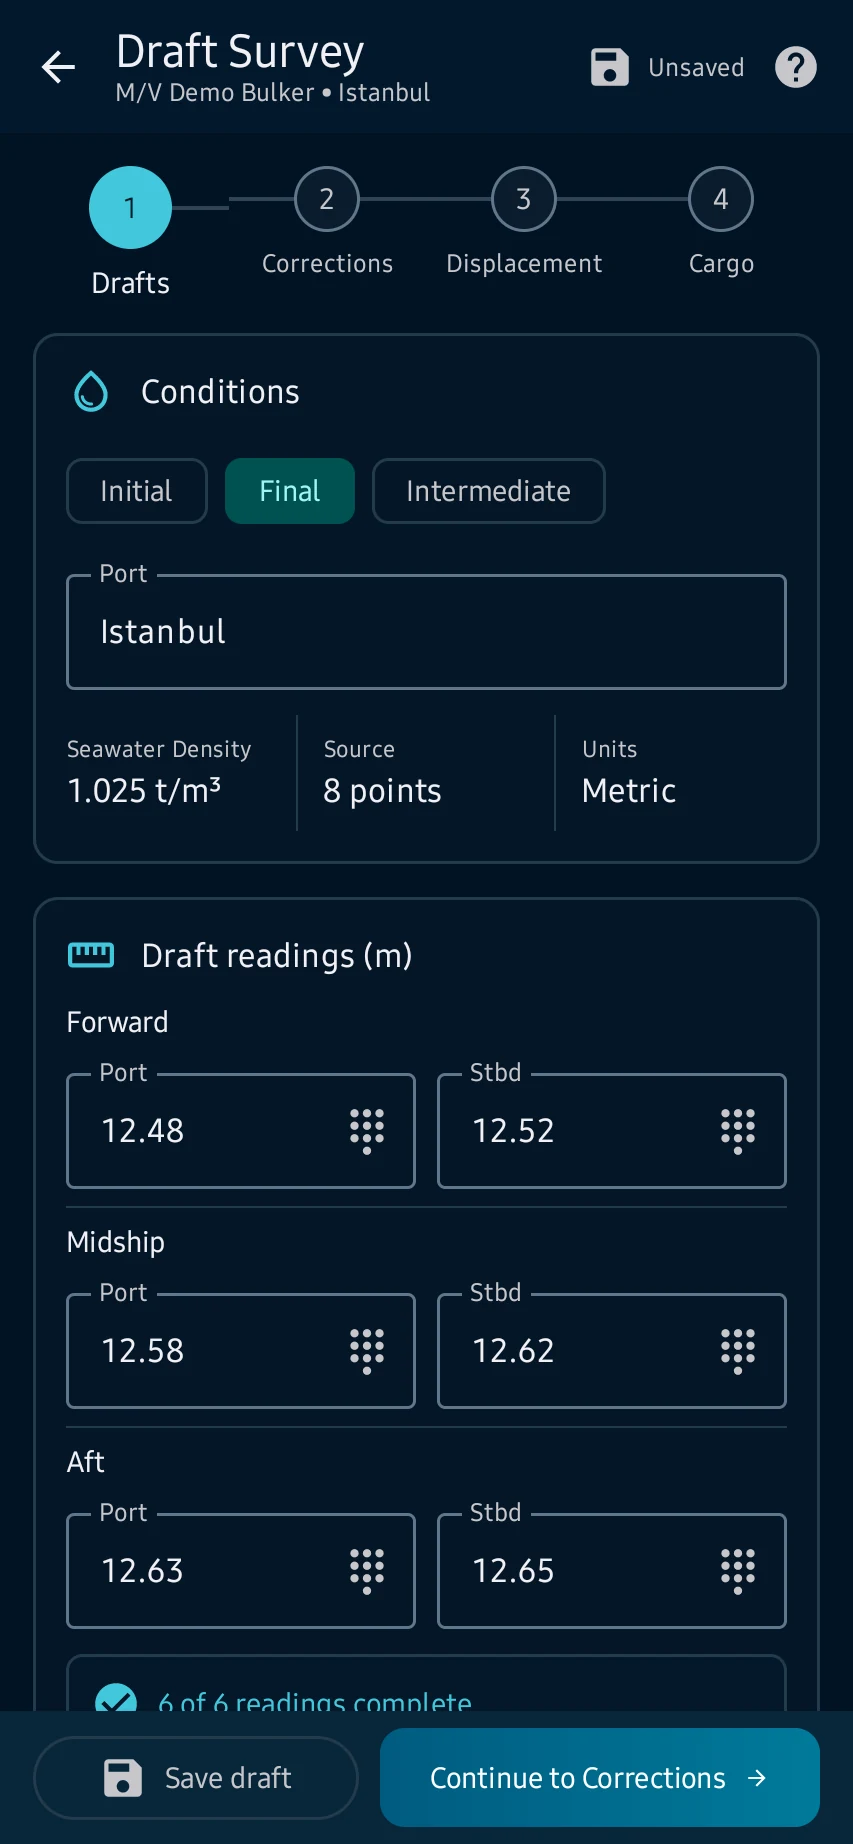
Complete a four-stage draft survey

Choose the active vessel and condition, enter measured values carefully, correct highlighted issues, calculate, compare with approved criteria and save the record. Replace all example values before real work.

  1. Drafts: open Stability → Draft Survey, select the correct vessel and survey type, then enter the port and all six forward, midship and aft draft readings.
  2. Corrections: review the mean-draft and trim correction, enter dock-water density and use only applicable, source-backed deductibles.
  3. Displacement: continue after validation and review corrected mean draft, trim, density correction, hydrostatic interpolation and computed displacement.
  4. Cargo: compare displacement with lightship, deductibles and any previous survey; resolve warnings, verify against approved sources, then save or export.

Follow the steps in the app

Read the detailed guide

Complete a four-stage draft survey
09

Work with cargo, holds and tanks

Choose the active vessel and condition, enter measured values carefully, correct highlighted issues, calculate, compare with approved criteria and save the record. Replace all example values before real work.

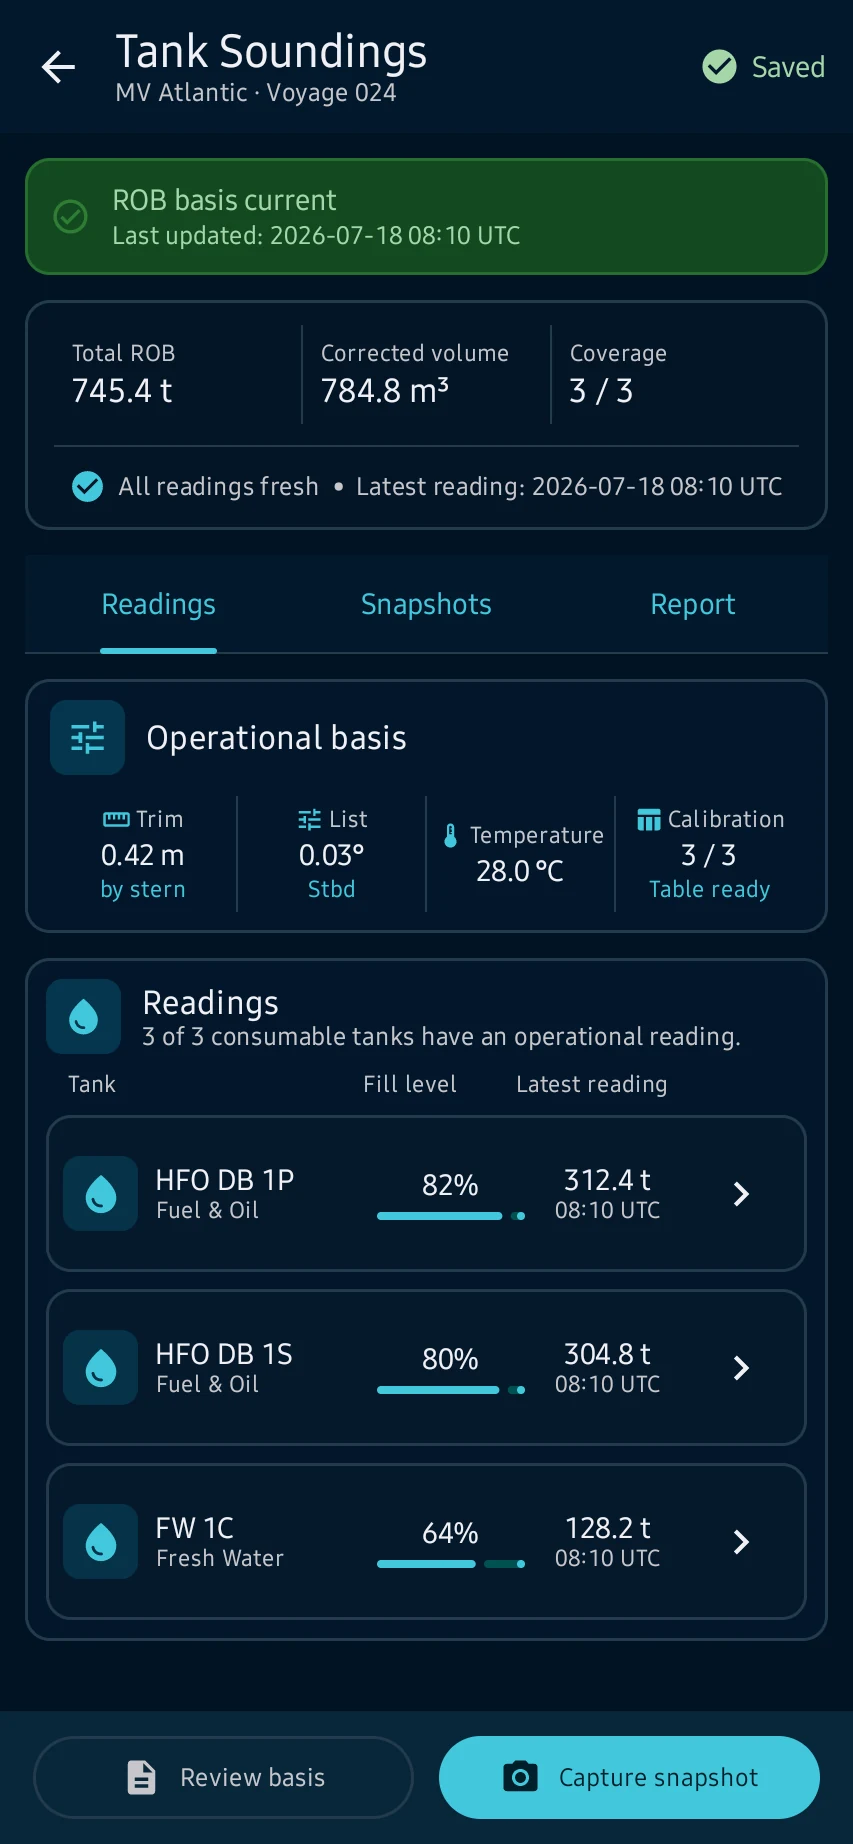
  1. Cargo or Tanks → choose the active vessel, condition, hold or tank before entering measurements.
  2. Enter cargo weights and centers or tank sounding/ullage, density and temperature using approved capacity and calibration data; keep example values separate from real measurements.
  3. totals, corrections, free-surface context and the affected loading condition remain traceable to the selected records.
  4. Resolve capacity, calibration, unit and FSM-verification warnings before saving; recheck the complete condition in the approved loading system.

Follow the steps in the app

Read the detailed guide

Work with cargo, holds and tanks
10

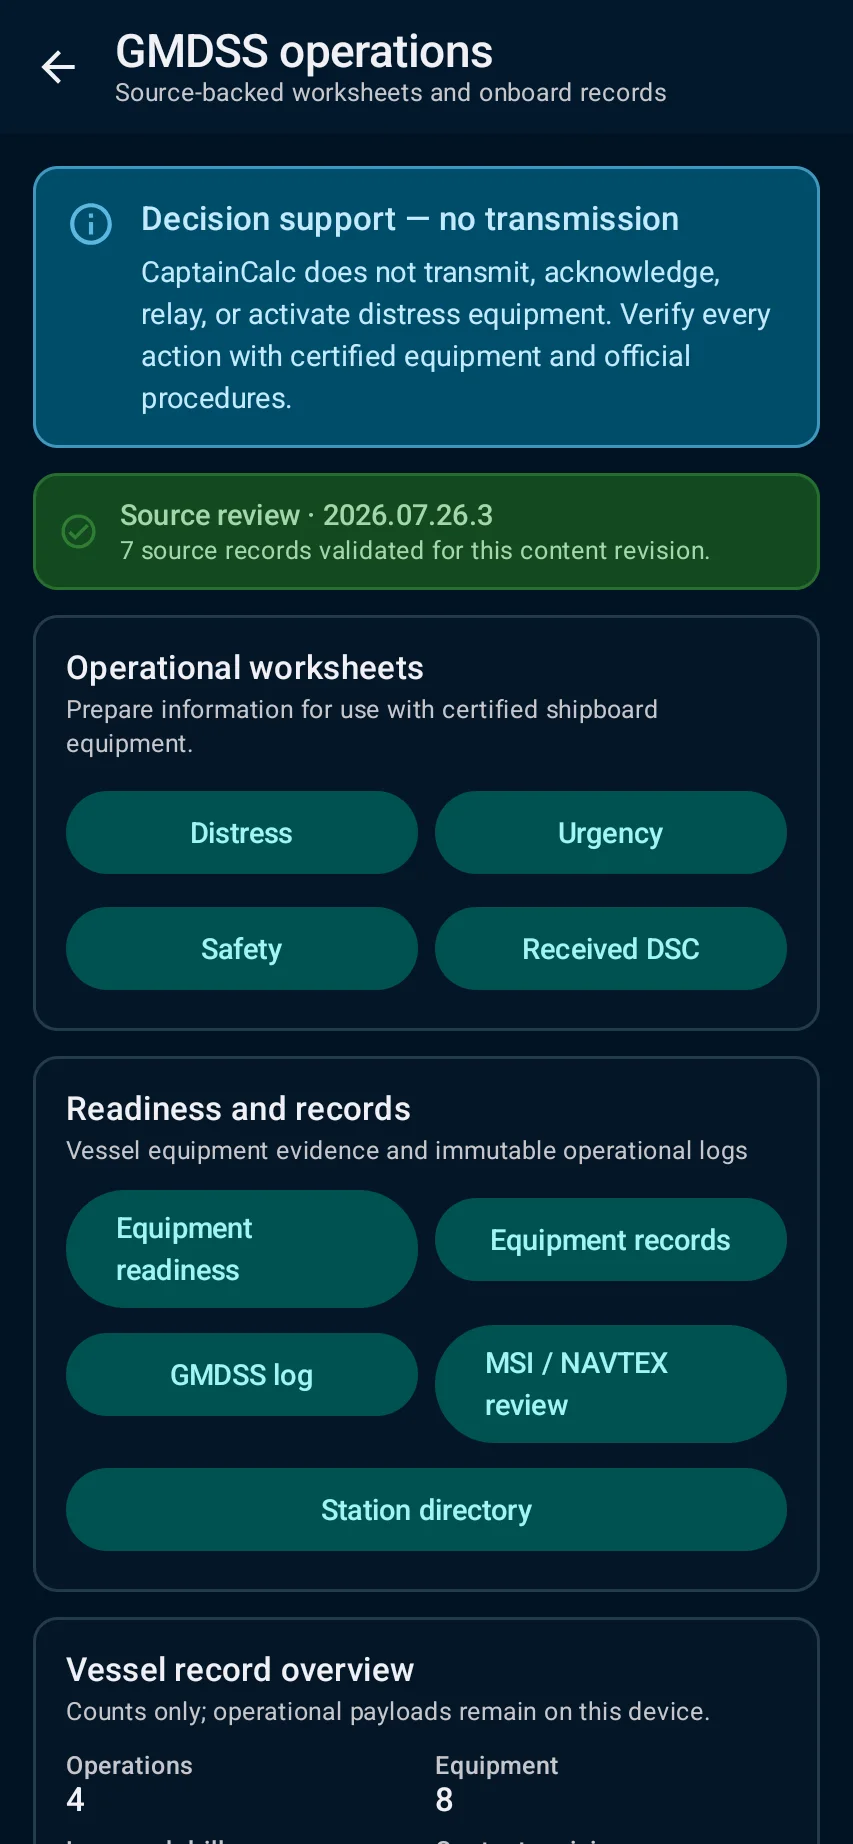
Prepare GMDSS work

Choose distress, urgency or safety, complete the DSC worksheet, run readiness checks and create authorized log records. Use MSI/NAVTEX and station information as decision support only; transmit using certified equipment and approved procedures.

  1. GMDSS → select the DSC worksheet, readiness, radio-log, station or MSI/NAVTEX task you actually need.
  2. For training, use example nature, area, UTC and position details; confirm equipment readiness and the source/version of station information.
  3. the app prepares a worksheet or authorized record and shows missing fields; it never transmits or controls radio equipment.
  4. Resolve incomplete or stale-source warnings, then save only an authorized log record. Make transmissions with certified equipment and approved procedures.

Follow the steps in the app

Read the detailed guide

Prepare GMDSS work
11

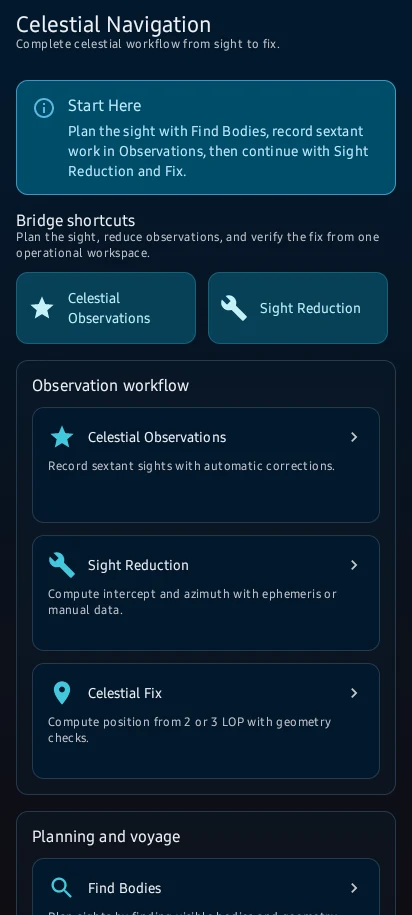
Record and reduce celestial sights

Create observations with UTC time, DR position, body and sextant inputs; apply corrections, reduce sights and combine LOPs into a fix. Use quick calculators for repeatable bridge checks and save key results.

  1. Celestial → New Observation; prepare UTC, DR position, selected body and current sextant/environment inputs.
  2. Enter sextant altitude, index correction, height of eye, pressure and temperature; use a clearly labelled example sight.
  3. corrected Ho, computed Hc, intercept, Zn and line of position are shown with the selected time and body; combine compatible sights for a fix.
  4. Resolve time, body, ephemeris and input warnings before saving. Cross-check with the current official nautical almanac and established procedures.

Follow the steps in the app

Read the detailed guide

Record and reduce celestial sights
12

Use safety and reference tools

Open the Safety & Reference workspace, choose the correct content family, review its source and limits, and cross-check the current official publication.

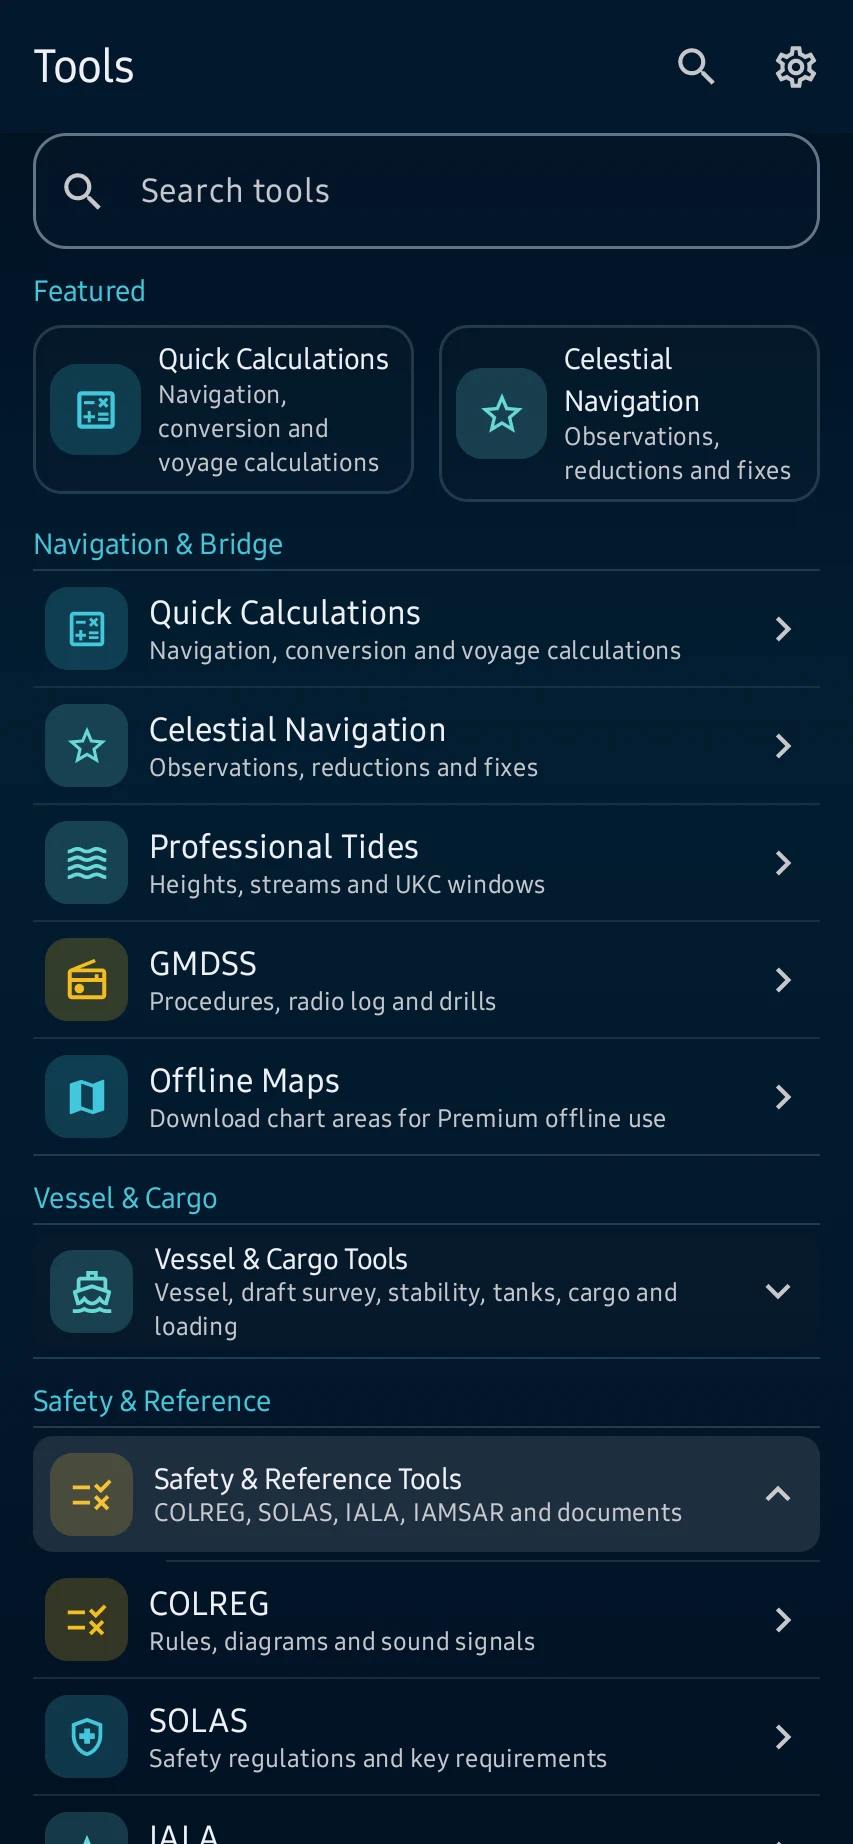
  1. Path: Tools → Safety & Reference Tools; choose COLREG, SOLAS, IALA, IAMSAR or Documents for the subject you need.
  2. Search or open the rule, diagram, signal or checklist, then review its content family, revision context, source note and displayed limitation.
  3. Use bookmarks, diagrams and the sound-signal simulator as learning and recall aids; the app does not replace a current official publication.
  4. Before an operational decision, cross-check the applicable current convention, flag/port requirements and approved onboard publications.

Follow the steps in the app

Read the detailed guide

Use safety and reference tools
13

Review records and export

Open Records to inspect voyage, stability, draft, tank and calculation history. Export only supported formats and review the generated file before relying on it in another system.

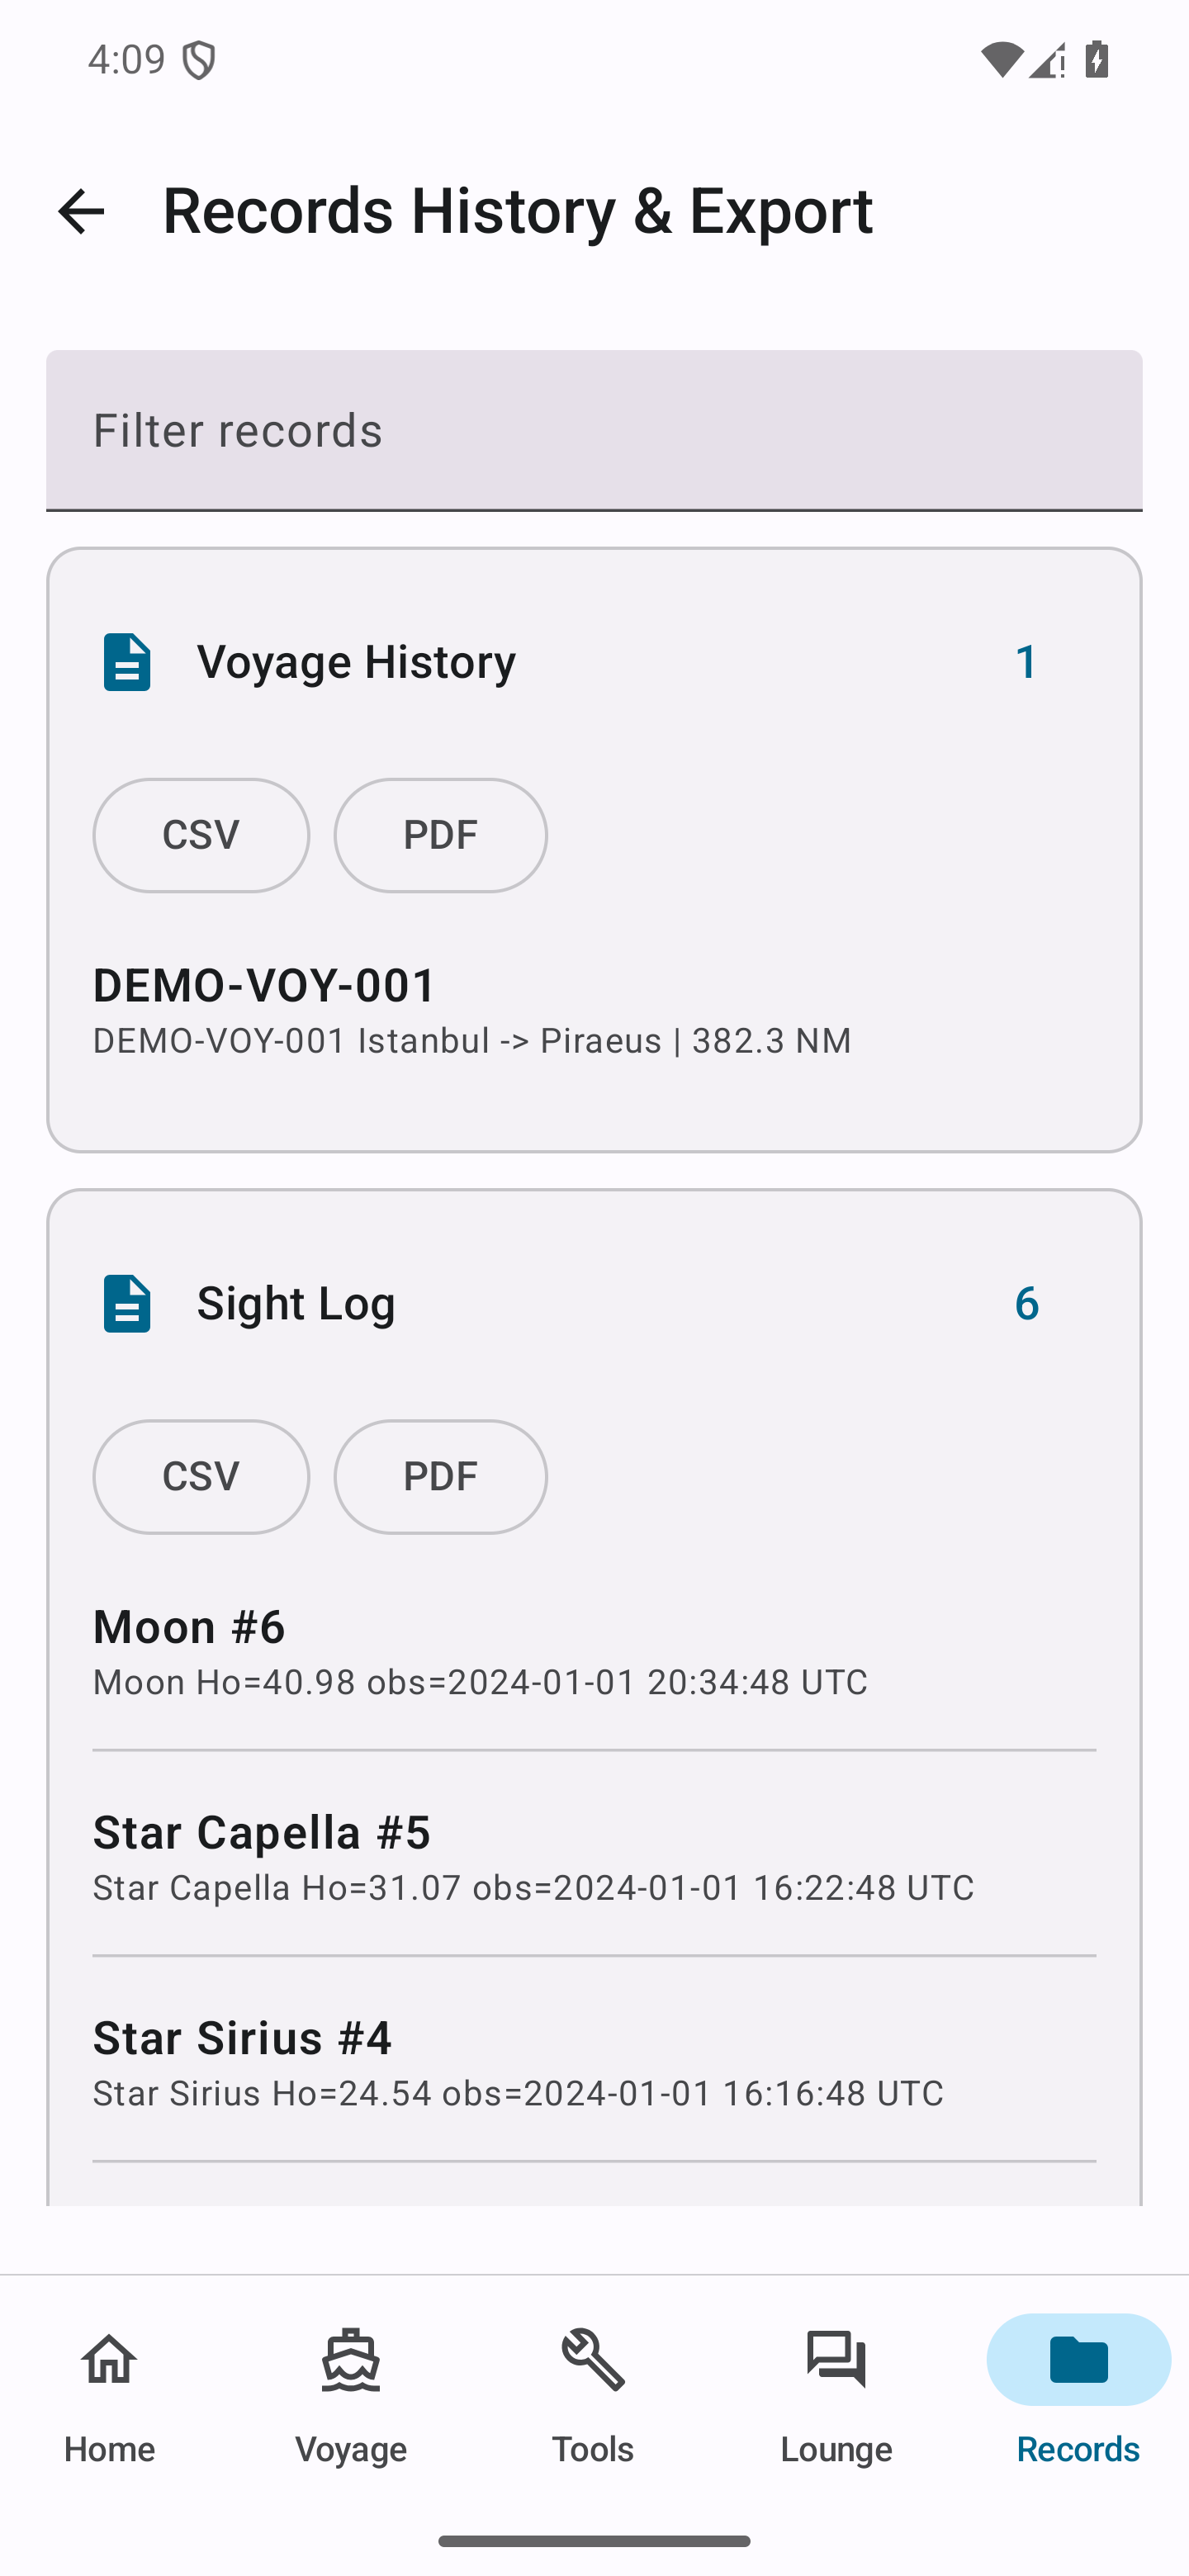
  1. Open Records for the active vessel and choose History & Export. The Records hub keeps stability, draft-survey, tank and cargo history in one place.
  2. In the populated overview, review voyage history, celestial sights and fix sessions; filter by vessel, date or record type when needed.
  3. Open the stability and track section to confirm case names, status, source details and timestamps before comparing or exporting records.
  4. Open the draft-survey section, verify survey type, port and time, then export only the intended record and inspect the exported file.

Follow the steps in the app

Read the detailed guide

Review records and export
14

Use Captain's Lounge responsibly

A moderated, text-only professional discussion space for ports, routes, weather, cargo, stability and app tips, with rules, reporting, blocking and moderation.

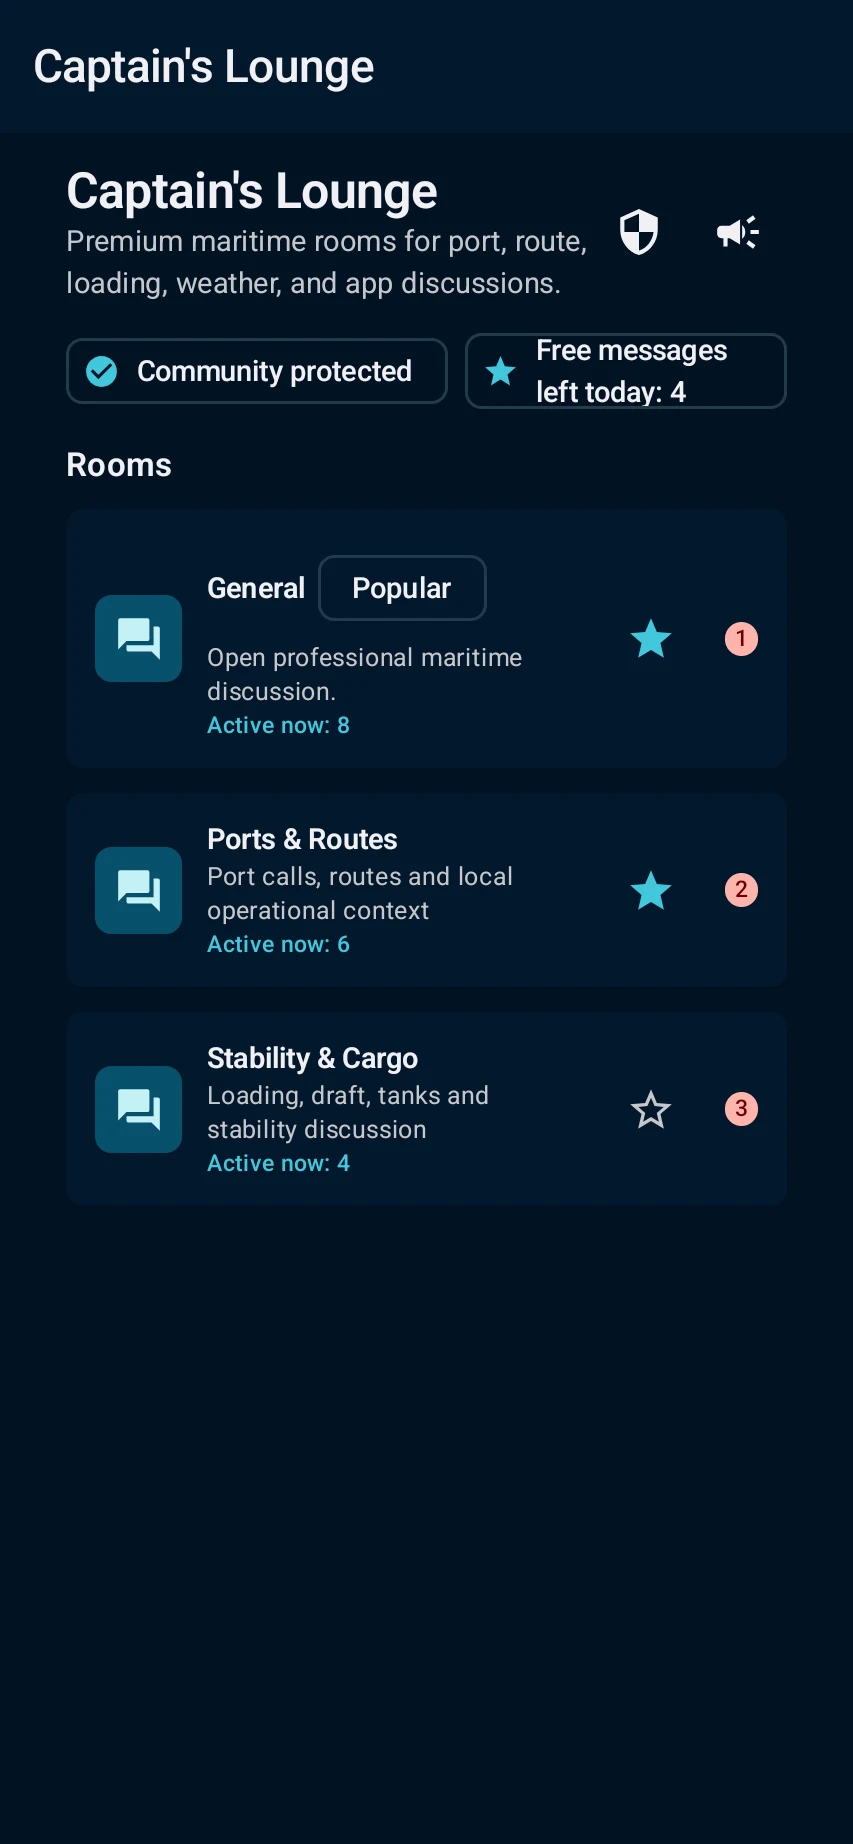
  1. Open Captain's Lounge, review the public-room purpose, unread count, community-protection status and free-message allowance, then choose the relevant room.
  2. Read the room notice before posting; never share private, contractual or safety-sensitive data. Use report/block controls for abuse and official company, class, port or bridge channels for operational decisions.

Follow the steps in the app

Read the detailed guide

Use Captain's Lounge responsibly
15

Prepare for weak connectivity

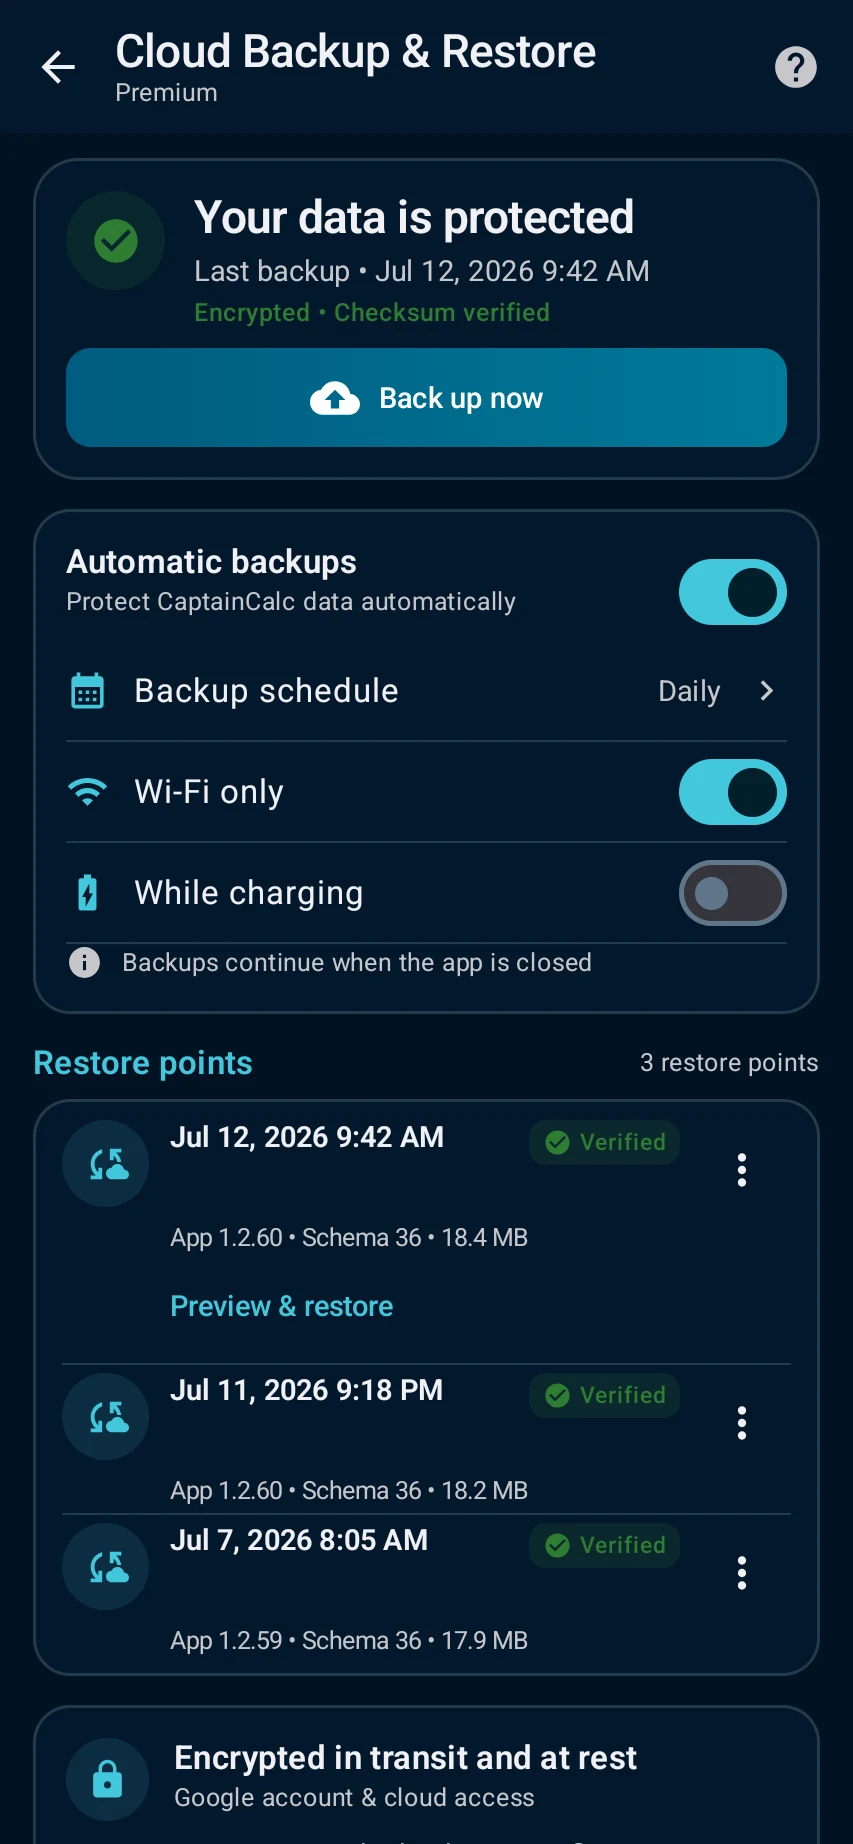
Optional encrypted snapshots with up to 10 restore points, same-account recovery and up to 30 days of retrieval after Premium ends. Backup is not live synchronization.

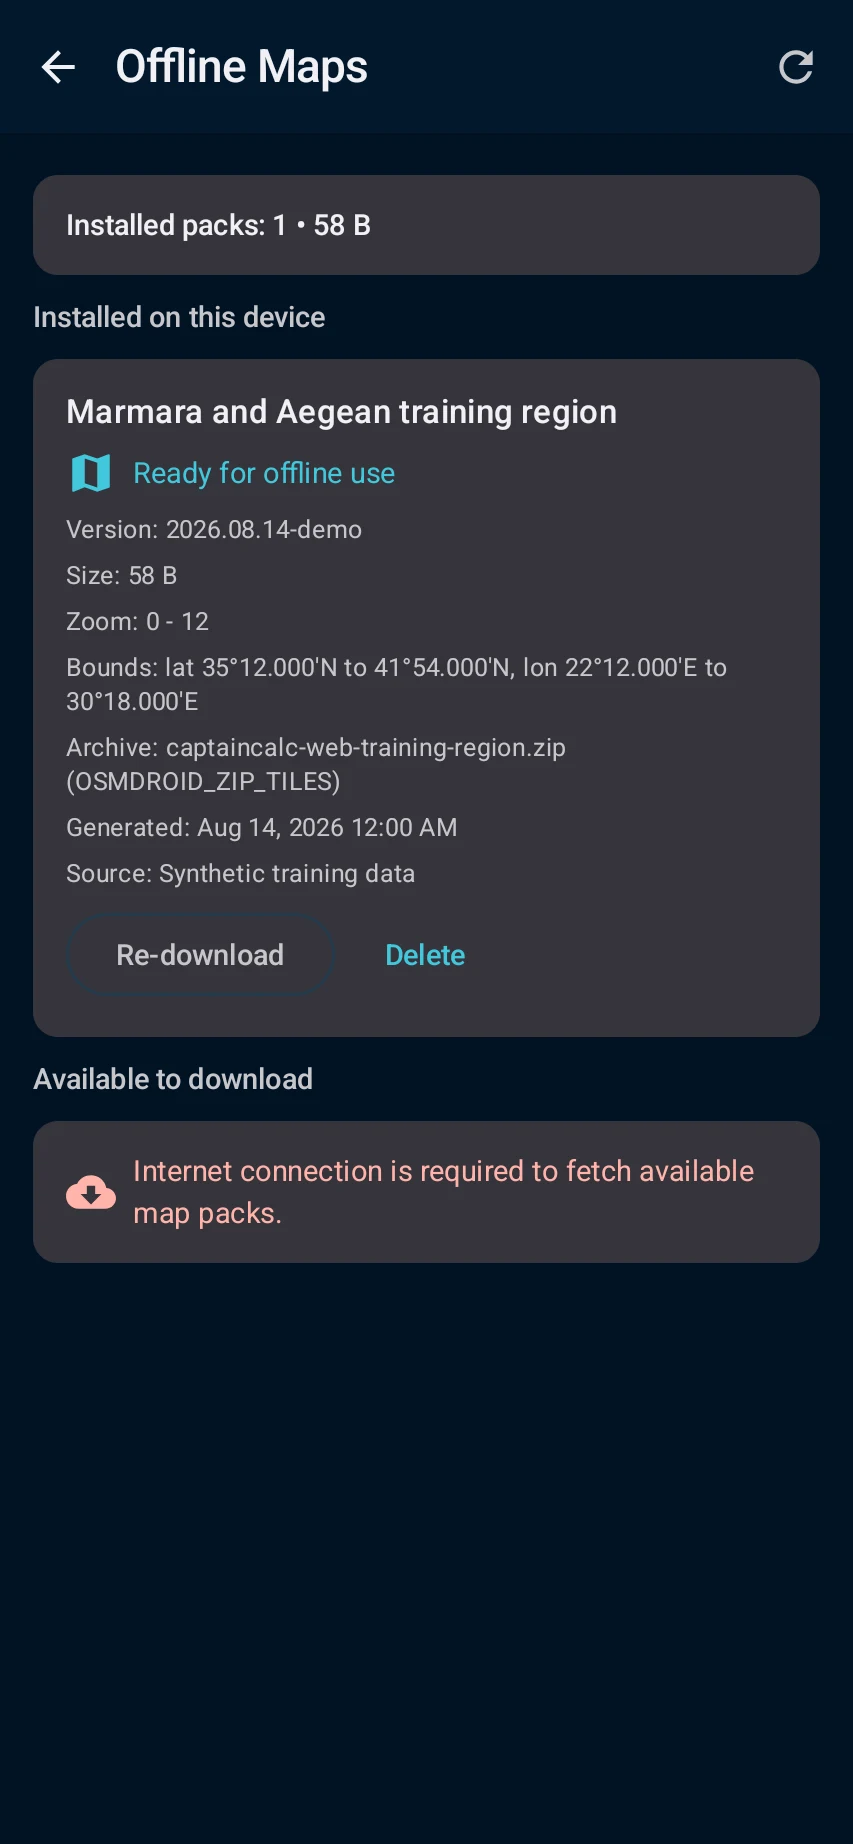
  1. Settings → Offline Data or Offline Maps while a reliable connection and required access are available.
  2. Select only the supported region or data pack needed for the voyage, download it and review version, validity and verification status.
  3. installed content is listed as ready and the relevant workspace can identify the local source when connectivity is absent.
  4. Test the prepared workflow before departure. Offline availability is feature- and pack-specific; never assume a missing or expired source is current.

Follow the steps in the app

Read the detailed guide

Prepare for weak connectivity
16

Manage privacy, ads and Premium

Analytics controls are in Settings. GDPR consent is requested only where legally required; outside those regions personalized advertising defaults on. Premium users can create encrypted snapshots and restore them on the same account; backup is not live sync.

  1. Open Settings → Privacy and review the advertising choice, diagnostics/analytics control, Terms and Privacy Policy that apply to your region; consent rules can differ and non-personalized ads may still be served.
  2. Review Cloud Backup and local backup separately: Premium cloud backup creates encrypted restore snapshots for the same account, is not live sync, supports up to 10 points, and must show a successful current status before you rely on restore.

This is a product-behavior summary, not legal advice. See Privacy & Terms for the current policy. Open Privacy & Terms

Follow the steps in the app

Read the detailed guide

Manage privacy, ads and Premium
17

Solve common workflow problems safely

If a source, access, location permission or vessel detail is missing, CaptainCalc explains what is needed. Check the connection, permissions and data date, then try again without using an outdated value.

  1. keep the screen where you stopped open and read the exact validation, source, permission, vessel-data or access message.
  2. Open the named requirement, restore connectivity only when verification needs it, correct the input or permission, then return to the same workflow.
  3. the unavailable item clears and the result shows a current timestamp, source and assumptions rather than a outdated value.
  4. Never bypass a missing requirement or copy a partial value into an operational record. If it persists, record the non-sensitive error text and app version for support.

Follow the steps in the app

Read the detailed guide

Solve common workflow problems safely

CaptainCalc is decision support. It never replaces approved stability data, loading computers, ECDIS, official publications, procedures or professional judgment.

Get CaptainCalc on Google Play

Freemium keeps essential online tools available with ads. Premium removes ads, raises limits and unlocks the complete offline professional workspace.

Get it on Google Play